Philosophy and Practical Advice for Film Editing
There are many editing techniques that are worth understanding in detail, but the practical essence of the job is very simple:
Editors arrange selected audio, video, images, and music clips into a specific sequence in order to tell a cohesive narrative story
Our individual edits can be hard cuts with audio & video changing at the same time, overlapping “J” or “L” cuts where the audio or video cuts happen at different moments, they can involve transitions such as dissolves, audio crossfades, wipes, whip-pans, etc. There are tons of options inside Premiere and other Non-Linear Editing systems, and you have the power to choose all sorts of different approaches as an editor… But truthfully, because the essence of the job is simply about making clip selections and arranging them on a timeline, the vast majority of the work consists of carefully choosing when to begin and end a clip, and where to place that clip in the structure of the story you’re telling.
The rest is a matter of how you transition from one clip to another, and that will vary based on your aesthetic preferences and on what mood or idea you’re trying to convey. The true depth of creative techniques that are possible is a subject for another time, but what’s important for me to convey in this post is what makes a film well-edited… Or not.
Over the years working as an writer, editor, and producer, I’ve learned a lot about what works and does not work to convey a particular tone or emotion and how to present audiences with a coherent narrative..
To accomplish this, an editor needs to understand the significance of their choices at both the micro and macro levels.
This is the difference between momentary, shot-to-shot cuts (micro) and the structural construction of the story as a whole (macro). It’s important to pay careful attention to each individual cut, but also to how each scene fits together. Every choice the editor makes affects the pacing and tone of the film, and determines which information is revealed to the audience and how quickly. These choices matter.
The control of information is what makes the editing process so powerful.
I’m not going to focus a ton on the macro aspect of editing, as virtually all the advice I have to give in that arena would simply be a restatement of my post on dramatic writing. Instead, we will discuss the micro level of editing -- how and why to execute specific cuts.
But before we get to that, I think it’s really important to understand a bit about the history of the artform.
The History of Editing
Alfred Hitchcock once said:
“Drama is life with the dull bits cut out”.
But… He actually disliked the use of the word “cutting” to describe the editing process. Instead, he spoke of editing in terms of “assembly”, or “montage” -- the act of putting images together, which in succession would “create an idea” in the minds of the audience.
At its most basic level, this is all there is to film editing. Editing is the process of juxtaposing various images in order to tell a story.
Of course, Montage was not Hitchcock’s invention. We owe that debt to Russian director and film theorist, Sergei Eisenstein.
In the early days of cinema, there was very little editing at all. When Louis & August Lumière introduced their Cinematographe, they would only show uncut scenes. The first clip ever shown to an audience in 1896 was simply a train moving towards the camera. But that was more than enough. The sight reportedly terrified audiences, who thought the train would burst out from the screen and run them over.
For the next few decades, silent movies were growing in popularity, and with new audience came new techniques in filmmaking.

First there was Edwin Porter, who started connecting different shots together to form a longer movie in the early 1900s. Then brilliant innovators like Georges Méliès figured out that they could build special effects in the camera by stopping the recording, moving to another scene or location, and picking it up again.
Soon, filmmakers like D.W. Griffiths began experimenting with connecting multiple shots together with unique camera angles to tell a more complete story, culminating in his 1915 film Birth of a Nation, which incorporated numerous camera and editing techniques.
But in 1925, when Sergei Eisenstein broke new ground in cinema with the Soviet propaganda film Battleship Potemkin, we started to see a new form of storytelling. Eisenstein’s use of “montage” allowed him to create moments of energy and meaning throughout the film by connecting multiple shots together in a sequence. We take this for granted now, but this was one of the first real examples of using editing to create a coherent scene built around expressing a specific action and mood.
It also allowed him to exploit a technique now known as the “Kuleshov Effect”, so named for Eisenstein’s contemporary Lev Kuleshov, a filmmaker who conducted a number of experiments in the 1910s and 20s showing how editing two different images together in a sequence could create a specific meaning for the audience.
Consider this pairing:


Perhaps it suggests to you a grandfatherly man who has concern or love for his dog. Perhaps it makes you think of homelessness. But what if we put two different images together?
Like this:


Now what do you see? Sadness? Loss? A man who misses a child perhaps? Something else entirely?
The reaction of the man has not changed. It’s the same image, but the second image adds context, and that context shapes how you perceive the pair as a whole. Each grouping of images provides us with more information, and taken together, it helps us better understand the story.
As editors, our job is to understand how these pairings affect the audience and to choose the imagery we include carefully so that we focus our viewers’ attention on not only the right moments of dialogue or action, but also -- more importantly -- the right meaning.
Since the 1920s, the craft of editing has developed in spectacular ways. The Jazz Singer marked the birth of the “talkies”, which meant sound and music were added to the filmmakers’ toolkit. Then, with 1935’s Becky Sharp and 1939’s The Wizard of Oz, we gained the beauty of Technicolor.
Even so, editors continued to hand-splice strips of film together with cumbersome devices like Moviola or Steenbeck machines. This was referred to as “linear editing”, and many of history’s greatest films -- Double Indemnity, Psycho, The Godfather, Star Wars, E.T., etc. -- were all edited using this painstakingly slow process.
But that all changed in 1989 when AVID introduced the world’s first computer-based “non-linear editor”.
NLE’s opened the door to modern editing as we know it today with software like Adobe Premiere and Apple’s Final Cut, where instead of having miles of celluloid literally laying about the cutting room floor, all of our core assets are hosted on a computer and we work in visual sequences and get to watch the products of our labor in close to real time.
Non-Linear Editing also changed the nature of special effects.
All of the compositing we used to have to do in camera or through multiple panes of glass can now be done in a computer as well.
Having started this kind of work during the early days of the NLE, I have to say… Life is very, very good.
So with that in mind, let’s talk about some techniques for modern video editing. For me, everything begins with one phrase...
Organization Will Set You Free
As an editor, this is my mantra.
I believe -- and have had this lesson repeated through practical experience over and over again in the past decade -- that the single most important skill you can learn if you want to become a successful film & video editor is exceptional organization and attention to detail.
Consider that most film and video productions require an enormous number of digital assets.
Some documentary projects I've worked on have been the product of several thousand video clips, audio recordings, images, motion graphics & animations, and text documents. Even simple projects may still incorporate hundreds of files. Keeping track of this much data is an immense and critical task.
Careful and clear organization will allow you to know where each asset is and find it at a moment's notice and consistency of naming conventions and organizational habits will allow you to search for and find what you need even if you can't quite remember what you did before.
What's more, this absolutely must happen before any of the creative work can even begin, and the better and more consistent your organizational system is, the more efficient your editing will become. Trying to re-organize a project or a file system after you've already done the first draft is a disastrous nightmare that will take you a hundred times as long as simply doing it right before you start.
And although it may seem tedious and slow you down up-front, proper organization will save you countless hours in the long run and it will enable you to avoid innumerable headaches -- particularly when working on a project with multiple people or transferring data and project files to different drives or computers.
The organizational choices you make at the beginning of a project will dramatically affect your workflow throughout the editing process -- from rough cut to final polish draft -- so here's how to get it right.
File Systems & Naming Conventions
No matter what computing OS you use, you should never rely on your computer's default settings and search features to determine how you set up a project folder and save files for two major reasons:
This is the best possible way for assets to get saved in random places and thus be unavailable when you or people you're working with need them; and…
Mac OS and Windows have different rules for what kinds of filenames are allowed, and if you don't use a system that works with both, transferring from one machine to another may be a catastrophe
Here's a step-by-step guide showing you how I avoid these problems:
Step 1: Create a simple and consistent folder structure for organizing project assets:
For virtually all video projects, I use the following basic folder structure:
YYYY.MM.DD-CLIENT-Project Name
AE Projects
Audio
Music
Dialogue/VO
Recording Session Files (if applicable)
Documentation
Images
Motion Graphics
Video
Stock Video
zzzOLD
As you can see, there are sub-folders that contain each individual asset type, in order to make it easier to differentiate between categories. This also makes it easy to import into Premiere (or any other editing software) once you're ready to begin working on your first draft.
The sub-folders should be fairly self-explanatory, but to be clear, here's what goes in each of them:
"AE Projects" contains any After Effects animation, chyron, or other VFX project files;
"Audio" contains all forms of audio media including Music, Dialogue/VO, and occasionally recording sessions depending on whether or not that was relevant to the project. I’ll often make 3rd level sub-folders for Music, Dialogue, and VO;
"Images" contains all non-video imagery, including JPGs, PNGs, and even sometimes GIFs prior to converting them to MP4 or some other file-type that can be more easily used in Premiere;
"Motion Graphics" contains all final animations, overlays, bumpers, etc. that will be used in the final video. Most of these files will technically be video files (MP4s, MOVs, AVIs, etc.) but they are created in animation and VFX software, as opposed to being recorded by a camera or acquired via stock media sites;
"Research & Documentation" is a category not every project is going to need, but should include scripts, contractual information, PDFs, etc.;
"Video" contains all of your core video assets including stock footage (which I usually set aside into 3rd level sub-folders based on where it came from, so as to make licensing and clearance issues easier to manage later), and all video that I filmed for a particular project;
"zzzOLD" is a special sub-folder I frequently add to projects once I've gone through multiple versions. It's important to be as non-destructive as possible with your project management, so instead of overwriting old drafts or project files, I number them and place them in the zzzOLD folder as necessary
The only individual files I keep in the main folder are the project file(s) that I'm currently working on and exports of the final versions of the various deliverable files. I keep project files and final assets in the main folder because they're the two types of files that I'm most likely to want to access whenever opening the main folder.
Here's a real-world example:

Note: Once you're actually working in Premiere, the software will auto-generate a few other folders such as "Adobe Premiere Pro Auto-Save". They're important too, but irrelevant to the issue of intentional file-organization.
Remember, the goal for all of this is to make my own life easier in the future, so while I don't want to clutter up the main folder with hundreds of random assets, I usually do want to have access to the few files I'm going to need whenever I need to go in and make a change to the edit or upload the final video to YouTube or Facebook.
Step 1.5: Follow This Rule:
EVERY SINGLE ASSET USED IN YOUR VIDEO PROJECT MUST BE SAVED INSIDE THE PROJECT FOLDER.
There is literally no way I can overstate how important this is.
When you're on a deadline missing assets and files that aren't where you think they're going to be can derail your workflow. If you have to transfer your project file to another editor for VFX, After Effects or audio work, or simply to do the final polish edits and you don't have every asset contained in your project folder, they can't do the work. If they can't start working until you track down those missing assets and send them over, the project doesn't get done and you miss your deadline.
The solution to this is to make sure that no matter what, every asset you use is saved to one of these folders inside your main project folder.
No exceptions!
In a world where a 4TB hard drive costs less than $100, there's simply no excuse.
Even if you have standard assets (branding bumpers, stock footage, music, etc.) that you use in multiple projects, copy those files into your project folder.
Abide by this rule and about 90% of potential asset management errors will disappear.
Step 2: Create a clear and consistent file naming system:
First, a brief history lesson… I promise you, this is worthwhile context.
Over the last 15+ years, filmmakers have benefited tremendously advances in digital technology. We now have access to incredible cameras, powerful editing tools, and virtually unlimited data.
When I first began learning video production, these tools were barely functional -- cameras like the Canon GL2 were technically digital, but used 3CCD standard definition sensors that had barely any dynamic range, and you still had to record on miniDV tapes. This meant we not only had severe limitations for image quality using digital video, we also had significant limitations on recording time. But worse than all that, the capture process to transfer miniDV tapes to a digital file on a computer, suitable for use in Final Cut Pro, Avid, or Premiere was done in real time.
Plus, capturing media in Final Cut or Premiere was incredibly buggy. Attempting to capture a stretch of tape above 5-10 minutes into a single digital file would almost certainly crash the software, and the whole process would stop and fail if there was just one dropped-frame on the tape.
And if all that wasn't awful enough, digital storage was exceptionally expensive. I remember buying my first external Firewire HDD for about $250. It held a whopping 80GB.
Even so… I thought it was all incredible at the time. We were witnessing the birth of what has since been called "the democratization of media", and in the years since, we've all seen mind-blowing progress in the tools and technology of filmmaking.
But, this hasn't come without costs, and one of the biggest costs is that modern DIY filmmakers have often never learned how to log clips or develop organizational systems, and the immediacy of dragging a file from an SDHC card onto your hard drive has meant that few people stop to think about how they're going to organize information before they jump into creating their videos.
The result is that a lot of people end up working with hundreds or even thousands of video and audio files labeled things like Clip0259.MXF or TASCAM_04357.WAV
What's the big deal though, right? They'll probably re-label clips inside of Premiere or FCPX, so it's not really a problem.
Well… Not so fast. Think about what will happen a couple years from now (and if you do client work, I promise you, this will happen) when someone asks you to find them the raw footage of one specific clip so they can have a 30 second soundbite for their website. Do you really want to try to open the old project file, update it to whatever new version the software you're using is currently on (assuming you haven't switched to a different NLE), and then poke around in your project file so you can find this video clip, only to then have to spend even more time matching the relabeled clip to the original numeric video file?
As someone who's had to do this before, I can promise you, you don't.
If you can successfully navigate that kind of process at all, and there's a high degree of possibility that you won't even be able to load the legacy project correctly to begin with, it could take you as much as an hour to complete all the steps necessary to find one single file using that method.
If, instead, you learn from the past and adopt a logging system for the digital era by renaming all of your files as part of your offloading process, you will never have this kind of problem -- or any of the relinking nightmares that come with it -- again.
So… Here's what I recommend:
Audio files
"Description [UNEDITED].wav" for raw files
"Description [EDITED].wav" for files that have been mastered
Video files
"TYPE-Description XX.MXF"
"PROJECT-SCNXXTXX-CAMERA ANGLE.MXF"
Here are some real-world examples, starting with video labeling for documentary projects:

Here's how I do scripted, multi-camera file-naming:

Here’s how I label audio:

The basic rule of thumb is to think about what will be useful to you in staying organized with the project you're editing right now, but also to be descriptive enough to be able to search for the files you might need when you need them later.
Occasionally I will add dates (in the YYYY.MM.DD format) if it's absolutely necessary -- for example, if I have multiple documentary interviews with the same person, or if for some other reason it is important to keep footage organized chronologically inside a project -- but for the most part, I prefer descriptive clarity over numbers because that's what you'll remember when you go looking for files later.
To be clear, there is a lot more art to this process than science, but it's a critical step if you want to make sure that you will always know exactly what files you're looking at and you should do it right away once you've offloaded your media from the camera while it's still fresh in your mind what you shot that day.
Another major benefit to this system is that it cuts down on unnecessary sub-folders.
By labeling my files clearly and carefully, all of the video I'm using in a project can be kept together inside the 2nd-level "Video" folder without any additional levels of folder organization and I’ll still know what and where everything is.
This is not only helpful in terms of reducing the time it takes to search and finding what you're looking for, it also helps cut down on the length of your overall file paths. This is important because file path length is limited to a different number of characters depending on which operating system you use. A file path that is too long may not be transferable from MacOS to Windows.
One last piece of advice on the subject of file-renaming: Eliminate special characters.
Downloading photos, video, and audio from the internet can often result in some bizarre file names featuring characters like ~?`#$^*@, etc. Unfortunately, many of these characters are not allowed in the naming conventions used by different software and operating systems, so it's best practice simply to eliminate them altogether.
Relabel everything, try to be specific and clear, and keep it simple.
Step 3: Separate licensed/copyrighted content:
As one final, separate piece of advice on the subject of file organization, I've always found it best to be exceptionally clear about labeling copyrighted clips for which you have paid license fees or expect to have to clear with a lawyer at a later time.
Sometimes this will mean adding a 3rd layer of folders. As you can see image above, for example, you'll note that I have folders labeled "IKEA" and "News Stories" which I've used to separate footage given to me by the IKEA Corporation for use in a documentary, and footage pulled from various television news broadcasts relevant to the documentary, but which were not produced by me for that project.
This may or may not ever be an issue for you, but consider that if you do ever need to justify your use of copyrighted content in a video, you'll be glad you made sure it was easy to find and clearly separated from the content you produced yourself.
Importing Media, Organizing Bins, and Project Set-up
This next part will be somewhat specific to Adobe Premiere, but most Non-Linear Editing software is set-up in similar ways, so it should be conceptually (if not literally) transferrable to other software.
And… Here's some great news right off the bat:
If you've organized all your files in the way that I've suggested above, you can simply import four of the main folders (Audio, Images, Motion Graphics, Video) exactly as they are, directly into Premiere. Once the import is complete, most of the work for basic project set-up will already be done!
Hooray!
Of course, you may still need to do some additional organization inside your project in order to manage your assets more carefully.
Take, for instance, the documentary project I used as an example in the previous section. A lot of the Motion Graphics used in the final video were linked compositions from After Effects so they were imported into the Motion Graphics folder, and the mastered audio from each of my interviews for the film were ultimately moved into the "Video" sub-folder along with the corresponding video footage.
Here are some examples of this kind of organization inside Premiere.

Please note that the same principles of organization I use in the file system are still in effect here.
Assets are organized by first by type, then by their purpose/use, and within that even more specifically by description. Also, the only assets which are kept outside the "Assets" folder structure are the MASTER [vXX] sequences -- in other words, just the sequences I'm currently working on are immediately accessible when I open the project.
When I've moved onto a new draft of a sequence (for example, from assembly to rough cut to draft 01, etc.), the older drafts will be moved into a zzzDRAFTS folder:

Notably, I do considerably more folder/bin organization inside Premiere than there I do in the file system so that it's as easy as possible to find assets of particular relevance to the project when I need them. It's also helpful to create more folders because there's limited screen real-estate inside Premiere at the best of times, so looking at smaller chunks of assets at a time makes it much easier to see everything you need to see and, just as critically, nothing you don’t need to see at the moment.
For example, look at the exploded view of just the Video assets:

B-Roll is separated by location and purpose.
Interviews are separated by subject, and even within that are further organized with special sequences and sub-folders -- which we will cover in more depth in a future section on "The Magic of Nested Sequences".
I've also created “zzz[ _______ ]” SEQUENCES folders to keep working sequences of Interview & B-Roll clips organized and easily in reach without diving deeper into the project folder structure. These sequences are essentially the ones I work off of the most. For instance, with B-Roll, I will lay out all the B-Roll for a particular location or theme out on a single timeline and then scrub through that whenever I need to find an element to use in my master sequence.

Or with interviews, I will create a sequence called something like “Glenn Reynolds [Cut]”, insert a Multi-Camera Sequence or other Nested Sequence into that timeline, and then listen through them and break them down even further by re-labeling sections -- then I will normally duplicate those [Cut] sequences, relabel them as “Glenn Reynolds [Clips]” and cut out all the extraneous junk, including unusable bits, my off-camera questions, dead space, etc.
Lastly, I’ll put all of those [Clips] sequences in a separate “zzzCLIPS SEQUENCES” folder up one level of organization.
This last step tends to be one of the most important ones, because with a project like this there are so many assets to deal with that keeping the most frequently used sequences easily accessible is extremely valuable, and getting rid of the unnecessary footage at this stage means that when I go looking for a particular clip, I can find it quickly and easily within the timeline.
However… The next part of the overall set-up process is going to involve creating a special kind of sequence in order to radically enhance the overall editing workflow.
The Magic of Nested Sequences
This section will show you how to spend 1 hour of your time setting up a special kind of sequence, which (if done correctly) will save you perhaps 100 hours at the end of your editing process.
Seriously.
To my knowledge, this is a technique I invented myself, based partly on my understanding of After Effects and Illustrator and many years working with Dynamic Linking in Premiere. I have never seen anyone who I haven't trained use it, nor have I ever heard of anyone doing it the way that I do. It's definitely the biggest area of departure between the way I edit with Premiere and the way every other editor and assistant editor I have known, hired, or contracted over the years has worked.
However, this isn't mere iconoclasm.
I'm not interested in a unique workflow just for the sake of being different. The technique I'm about to describe in detail uses the power of Nested Sequences and the principle of Dynamic Linking to radically enhance my workflow -- not just in terms of speed, which you will find is considerably improved overall, but in terms of reducing the possibility of mistakes at the end of the post-production process.
So… Ok, that's a lot of build-up.
The essence of this system is built on layering multiple assets into a new sequence (the Nested Sequence) and then importing that sequence into the master timeline and making all your cuts on the Nested Sequence instead of cutting the original video file.
I understand that this can be a little tricky to understand, so here's a step-by-step process.
Step 1: Create a new sequence
In Premiere, click "File > New > Sequence" or click "Ctrl+N". You can also click the button at the bottom of the project window to create a new asset.

Though it is possible that you may have multiple clips depending on whether or not you broke for different takes or have a camera system that cannot record for indefinite lengths of time (such as an DSLR or Mirrorless camera being used as a video camera), this sequence will be used for only one camera angle from one subject.
This is essential: You will not be cutting or editing inside this sequence.
Label it something useful and clear. As an example, look at some of my Nested Sequences from a documentary I recently edited -- specifically note the "processed clips" folder below:

I have two main Nested Sequences for this interview. "Glenn Reynolds [Close]" and "Glenn Reynolds [Wide]. These two sequences are based primarily on two video files, "INTERVIEW-Glenn Reynolds [Close].MXF" and "INTERVIEW-Glenn Reynolds [Wide].MXF", and will ultimately be used to form a Multi-Camera Sequence -- the purpose of which I will go into more detail about later.
Also note that these two video files have been preemptively synced to start at exactly the same frame, so later in this process, my Nested Sequences will be properly aligned. You may do this syncing process in a temp sequence as I have done ("Glenn Reynolds [Sync]") or you can do it in the Source Monitor using In and Out Points, assuming you have some auditory signal like a Slate clapper to clearly demarcate the start of your sync.
That part is up to you, but if you're working with multiple camera angles for a single subject like this example, it's important to sync them all before they are inserted into Nested Sequences. If you don't do this, then it will be unnecessarily difficult to create Multi-Camera Sequences.
Step 2: Add relevant assets to the new sequence
One you have created this sequence, add your previously-synced assets. Look the example of the "Glenn Reynolds [Wide]" Nested Sequence below:

In this sequence, you will see the full -- unedited -- video file of the Glenn Reynolds interview, in the wide angle. You'll notice that there's also an Adjustment Layer and an additional audio file. The Adjustment Layer includes color correction and any other effects I may choose to add to that footage, while the audio file is the full recorded interview audio mastered for broadcast.
We will also discuss why these additional assets are included in this Nested Sequence more in a moment, but please note that this is precise reason that this system is magic.
Step 3: Importing Nested Sequences into a NEW Sequence
This step could vary significantly depending on how you edit or how much material you have to work with, but for this project, I selected the two Nested Sequences for the Glenn Reynolds ("Wide" and "Close") and combined them into a Multi-Camera Source Sequence.

Then, I imported the Multi-Camera Sequence into a NEW Sequence, which I called "Glenn Reynolds [Cut]":

The reason I edit from Multi-Camera Sequences in this context is that, as an editor, I don't really want to be locked into camera angle choices early in my rough cuts -- but I also don't want a timeline cluttered with unnecessary tracks overlaid on top of each other. Without using the Multi-Camera Sequence technique, I would have to layer the Wide and Close angles on top of each other and add a 3rd hidden layer just to make the camera angle I didn't want to see for a given clip invisible.
I used to work that way. It was a mess, and that's just for 2 different angles!
With the Multi-Camera Sequence technique, I can create a single track that incorporates all my camera angles for a given scene or interview, up to the limits of my processor. I've done as many as 9 at a time. I've even done Multi-Camera Sequences created out of other Multi-Camera Sequences (don't try this at home, kids!) while editing music videos.
In the end, this system is just a lot cleaner and easier to deal with -- and it allows easy access to different angles at any point during the editing process, so I can make changes even in the final draft and it won't take me any effort at all this way.
If I did not have multiple camera angles, I would have skipped this step but still moved the single Nested Sequence into a new sequence of the same name.
And… That's it!
Step 4: Begin editing
At this point, my project set-up is complete and I can begin cutting through the interview footage, breaking it down and organizing it by color coding and renaming sub-clips. These clips will get sorted and inserted as necessary into my MASTER Sequence for the documentary, along with similar clips pulled from other interviews which have each undergone this same set-up process.
I normally do this in an intermediary sequence such as "Glenn Reynolds [Cut]", but if the project is very short or there aren't going to be multiple main voices I may do the cutting right in my final timeline.
I'll say it again… The point of doing all this organization is to make your life easier!
If it doesn't make any sense to break down your interview footage because it's just 5 minutes long instead of 40 minutes like the example I've used above, then don't do an intermediary sequence. It's fine. The important part of all of this is that you're only making cuts on the Nested Sequences as opposed to the raw video and audio files.
But seriously…. WHY DID I DO ALL THIS!?
Ok. This seems like an awful lot of work… And admittedly… It is.
Most people would just skip steps 1-3, import the raw video into a timeline, and start assembling their rough cut right away. But here's the thing… They're making tons more work for themselves later.
As most editors know, and are even taught in film school, the very last steps in the editing process are color correction & grading, audio mastering and mixing, and adding the musical score. But the result of saving these steps for last -- without undertaking the set-up steps I've presented here -- is that in the whoever does audio mastering and color correction will have to do this work clip-by-clip.
In some cases, this could mean literally hundreds, or even thousands of individual color corrections and audio edits.
This system saves the vast majority of that work, by allowing me to go back and make one color correction (on the afore-mentioned Adjustment Layer) and one audio master for the entire video. Because I'm cutting Nested Sequences instead of the raw video files, anything I do to the video inside those sequences will update through to the final product.
This saves countless hours of time, but also frees you up to make more creative choices without worrying about major errors later.
Consider, for example, the final MASTER timeline for my documentary:

This project is built off of 6 primary interviews, hundreds of hours of B-Roll, and perhaps a thousand edit points.
The man in the image above is a furniture store owner named Ron Becker, and he appears throughout the 20-minute film in dozens of individual clips. Now… Imagine for a moment that I decide I don't like the color grading I've done on Ron's face.
Under the standard editing set-up, I would have to go through this sequence -- clip-by-clip -- looking for individual instances of Ron Becker's interview. Then I would have to copy and paste my color grading changes into each one.
This minor change alone could cost me several hours in working time, and it opens up an enormous number of possible errors. What if I accidentally skip a clip? What if I don't use the same correction on all of the Ron Becker clips? What if I somehow delete some other effect I had worked on on one of the clips? What if I manage to accidentally move or overwrite something else I did?
The chances of messing up something new are significant, and all because I want to make one simple change to the color grading.
Instead, under my system, I can go back to the original Nested Sequence, make the one single change to the color grading applied to the Adjustment Layer, and through the magic of Dynamically Linked assets, every instance of Ron Becker in my final sequence are updated with the new color automatically.
Likewise, once I'm ready to master the audio for Ron Becker's interview, I can export a single unedited audio file -- which I will normally call something like "INTERVIEW-Ron Becker [UNEDITED].wav" -- then master that one file. Then I will save it as "INTERVIEW-Ron Becker [EDITED].wav" and import it back into the Nested Sequence.
I like to work as non-destructively as possible, so I will typically add it to a track below the original audio and simply mute the unedited version.
Again, look at this example:

The blue asset is the original video and audio. The green is the final, mastered audio that replaced the blue audio (which is now muted), and the pink asset is the adjustment layer on which I've done color grading.
Just like with the color grading question, if I don't like the audio master as it is, I can easily re-do it and overwrite the "[EDITED].wav" file and have each and every clip in the final timeline update throughout my workflow automatically. Plus, by working this way, my original video files and audio files always remain intact and I'm not having Premiere import anything into Audition -- which destructively overwrites files in the timeline.
Best of all, now, instead of editing the color and audio for literally dozens of individual clips cut from just 6 interviews, I only have to do the color and audio editing for those original 6 and let the system handle the rest.
To repeat: This system allows me to master just 6 audio files and make just 6 color correction & grading choices instead of dozens. Also, those 6 edits will affect the entirety of my final project without me having to lift another finger. And finally, if I decide to make a different creative choice at any time later in the process, I can modify what’s in the Nested Sequences and every clip pulled from those sequences that I’ve used in my final product will be automatically updated with the new audio or video effects.
And yes, this will even work through Multi-Camera Sequences. You can even replace your video files in the Nested Sequences with After Effects compositions and VFX if you have to.
I've recently built a system for an educational series using these same principles, wherein two of the camera angles for each scene have green screen elements. Using the Nested Sequence process, I've been able to create a single chromakey removal for all scenes at once instead of doing this kind of VFX work clip by clip.
I cannot even begin to explain how many hours of time this will save you, or how much less error prone your late-stage edits will be if you adopt this system.
All you have to do is take a little bit of extra time at the beginning of the post-production process, and think through your project set-up. If you do that, you can shave massive amounts of stress and time off of everything else you do from then on.
Cutting & Re-labeling Clips
Premiere has a number of tools that can help you organize footage even further inside a sequence. The two most powerful are the ability to re-label individual clips, and to change the color of the clip at will.
I frequently use both in conjunction with each other, particularly on complicated documentary projects in order to easily see what a subject was talking about at a specific moment in a long interview, and to color-code the subject's responses based on how useful I think the clip will be in the final video.
Here's an example of a subject interview breakdown, using this technique:

Re-labeling clips is as simple as finding a section that you want to keep, cutting down the non-essential parts, and then right-clicking on that clip to rename it something useful to you, and then right-clicking again in order to change the label color.
Typically, for scripted work, because I have already named each and every clip clearly by scene, shot, and take, I don't need to do any renaming. But for documentary work, I will take a long form interview and cut it into sections that are renamed based on the question and response.
In the example above, the original clip would have been named "Glenn Reynolds [Multicam]" -- remember, I'm only cutting other Sequences, not raw video files -- but it's 40 minutes long, so that's not very helpful when as an interviewer I may have asked Glenn a dozen questions. When I'm building the documentary's Rough Cut, I'm going to need to quickly find specific responses to those questions, so I before I even begin the Rough Cut assembly process, I'll listen through the interview again -- or have an assistant editor do it -- and carefully rename clips something useful. I'll also typically number them so if I can always go back and find out roughly where in the interview a clip came from, in case I might want to add more context at a later time.
In this case, the name of the clip has been changed to "Glenn Reynolds 08 - What you'd like to see is states compete with a good business climate"
This is a paraphrased quote from Glenn Reynolds that I thought would stand out in my memory as I was breaking down the interview.
You'll also notice that some clips are gold and some clips are pink.
The gold clips are the parts of the interview that I thought were "the best" -- clips that I would almost certainly find a way to use in the final film. These are the moments where Glenn Reynolds said something in a particularly interesting or pointed way, or where he succinctly made a point relevant to the theme of the film (which, in this case was corporate cronyism in Tennessee), or where he said something humorous or pithy, etc.
The pink color coding includes everything else that would still be usable.
I used to customize colors in Premiere, but anymore I just use their defaults because the version updates happen so quickly that it's just easier. But there's no significance to these colors other than that they'll stand out when I want to find something.
Note also that just because something is "pink" doesn't mean I won't use it in the final film.
The pink sections often contain more explanation of an idea, or an example that goes into detail. It's not as pithy or succinct, but there are obviously times when you need more context and dipping into the pink labeled clips has often been necessary. The purpose of the color coding system is simply to have an easy and efficient way of being able to quickly see where to start looking for a piece of my overall story.
This saves me from having to go back and listen to everything from the beginning or just trust that my brain will be smart enough to remember the timecode of a great quote from a 40-50 minute interview.
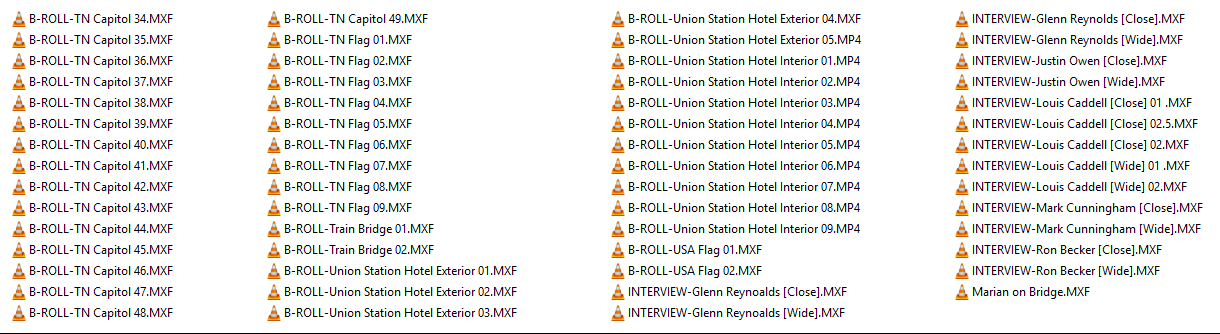
When you're doing documentary work, this can be a lifesaver. This documentary alone had 852 video assets, not to mention the audio and images that went into the final product. I have a pretty good memory, but relying on it to know where the best parts and top quotes or B-Roll shots from every one of those videos are in the timecode is a very bad idea.
I'm not that smart.
The Rule of Six
Now that your project is organized and set up effectively, we can finally get down to the business at hand: Editing.
There are a ton of factors to consider when deciding what constitutes good or bad editing, and I’ll get into some of my own thoughts about the artform as we go through this, but first, I want to introduce a concept from one of the greatest film editors in cinema, Walter Murch (The Godfather, Apocalypse Now, American Graffiti, The Conversation, The English Patient, etc.).
In his book, “The Blink of An Eye”, Murch lays out an idea he calls “The Rule of Six”, defining what he views as the six core priorities for an editor. The six elements, in priority order, are:
Emotion
Story
Rhythm
Eye-Trace
2D Plane of Screen
3D Space
Each of these elements is important, but some are more important than others, and I’ve found over the years that Murch’s advice is very good, especially if you think about it in terms of how you make each specific, individual cut.
Expanding on this concept, Murch says:
“What I’m suggesting is a list of priorities. If you have to give up something, don’t ever give up emotion before story. Don’t give up story before rhythm, don’t give up rhythm before eye-trace, don’t give up eye-trace before planarity, and don’t give up planarity before spatial continuity.”
But let’s get into this a little bit. What does Murch really mean?
Emotion: How does the cut you’re about to make affect the emotion of the scene? Does it make a scene that you intended to be calm more intense? Quoting Murch again:
“How do you want the audience to feel? If they are feeling what you want them to feel all the way through the film, you’ve done about as much as you can ever do. What they finally remember is not the editing, not the camerawork, not the performances, not even the story—it’s how they felt.”
A cut can distract from the emotion of the story, so be careful where you make your cuts so that you can actually preserve the emotion above everything else.
Story: Does your clip you’re cutting to advance the story? In narrative editing, plot momentum is critical, and it’s easy to get bogged down in sub-plots, or tangents that don’t really have any bearing on the story itself. Quoting screenwriter & playwright David Mamet:
“Any scene which does not both advance the plot, and standalone (that is, dramatically, by itself, on its own merits) is either superfluous or incorrectly written.”
Editing is, as they say, ‘the final rewrite’... It’s the last line of defense of any story, and Mamet’s words are just as true for editors as they are for writers. If the plot is not moving forward, the story is drifting, listless, and most likely confusing or boring the audience.
Rhythm: This one is going to be hard for people without an innate sense of rhythm or musical training to really understand, but good editing has a rhythmic flow. Like music, a film moves forward in time… And like music, the tempo of the editing can speed up or slow down, and this will affect the drama and emotion of the story.
On an even more basic level, human speech -- dialogue -- is rhythmic and sometimes musical. The way we often structure our speech is in phrases with antecedents and consequents. We take beats and pauses, and the natural mode of speech has an ebb and flow that can either be respected and enhanced by a cut, or it can be ignored.
Ignoring the issues of timing will create cuts that are too tight or too long. Beats that are compressed will feel cut off abruptly. Beats that are dragging will produce awkward pauses and unnatural rhythm.
Both errors are jarring to audiences, and in the end will create an overall film that is poorly and inconsistently paced.
Importantly, according to Walter Murch:
“Now, in practice, you will find that those top three things on the list…are extremely tightly connected. The forces that bind them together are like the bonds between the protons and neutrons in the nucleus of the atom. Those are, by far, the tightest bonds, and the forces connecting the lower three grow progressively weaker as you go down the list.”
He’s right. All three of these elements work hand-in-hand. Getting the rhythm of a cut wrong will affect the emotional qualities of the scene. Getting the emotion wrong will affect the story. Diverting from the main story at the wrong time will affect the pacing and stomp on the appropriate emotion.
On the other hand, the last three elements are more practical and physical in nature.
Eye Trace: Editing allows filmmakers to control where an audience is focusing their attention. This gives you as an editor a lot of power, and it can even be a way to misdirect or manipulate audiences to the benefit of the overall storytelling experience.
Think about how often you see a long close-up on the darkly-lit face of a protagonist in a horror film, immediately followed by a wider shot exposing the terrifying monster that jumps into frame.
The tight close-up restricts an audience’s field of vision, and in that context has a claustrophobic effect which only builds up the anxiety and tension that is released in the next shot. Those shots together create a jump-scare.
To quote Nicole Boyd of videoandfilmmaker.com:
“You should always be aware of where in the frame you want your audience to look, and cut accordingly. Match the movement from one side of the screen to the other, or for a transition, matching the frame, shape or symbol, e.g. Murch when editing Apocalypse Now uses the repetition of symbol, from a rotating ceiling fan to helicopters.
Break the screen into four quadrants, and try to keep the movement in one of those quadrants. For instance, if your character is reaching from the top left quadrant, and his eyes are focused to the right lower quadrant that is where your audience’s focus will naturally move after the cut.
Remember to edit on movement and to match the action, keeping the continuity as close as possible.”
Perhaps the best editor, and certainly best director of editors, in terms of managing his audience’s eye trace is the filmmaker Edgar Wright (Shaun of the Dead, Hot Fuzz, Scott Pilgrim, Baby Driver). Wright is a master at controlling where audiences are looking, and he accomplishes this by careful use of matched cuts combined with an impeccable sense of rhythm.
Two-Dimensional Place of Screen: This is an incredibly practical question of editing, but essentially it requires that your cuts follow the axis (180º line) in 2D space. That is, people on the left side of screen should stay on the left side, people on the right should stay on the right. If people are moving left to right, any subsequent shot should preserve that motion.

It’s always possible to choose to break this continuity, but doing so is incredibly jarring to audiences so know that reversing the directionality of action will stand out in a pretty aggressive way.
Three-Dimensional Space: Similarly, a cut that goes across the 180º line in 3D “Z-Space” is even more jarring. This would be a cut that takes you from viewing a scene from one angle to viewing it from the opposite side -- as if there were another camera directly opposite our current perspective.
These kinds of cuts will seriously disorient an audience, so use them carefully and sparingly, for example, only when you really intend to.
Now… Ideally, all of these elements should be preserved in every cut. But if you have to prioritize, note that Walter Murch does not treat them as having equal importance:

In Murch’s terms, 84% of editing comes down to Emotion, Story, and Rhythm. Regardless of whether or not measuring these factors as percentages makes any sense, the reality is that if you don’t have these three pieces working together, your cut simply isn’t going to work on a micro level, even if you get the bare basics like tracking 2D and 3D spatial relationships right.
The lesson you should glean from this is critical: If your individual micro-level cuts are badly executed, the whole film will fall apart.
All that said, we should never forget that the primary role of the editor is to tell a coherent story, and to do that, simply making sure that all your individual cuts are paced well and follow the emotion of the scene is not enough. The macro, or “structural” editing -- the choices you make about how scenes flow together -- is just as important. The macro editing is how you structure the story and how you reveal information to the audience. Both elements have to work together, and when they do, the edit will be truly good.
The Ethics of Editing
There’s a lot I’d like to convey in this section, and there’s really no way to get through all the things I’ve learned doing this kind of work in the last 15 years creating online and educational videos, documentaries, and short narrative or music-driven content.
What you need to understand is that at a very fundamental level, editing is storytelling.
The artistic principles of editing are fundamentally identical to the principles of good screenwriting… Only, editors have tools that extend far beyond words (sound, music, imagery, etc.) and and they have constraints the screenwriter doesn’t have.

A writer is only constrained by their imagination. The filmmaker is constrained by what is realistically possible to create.
A writer is only constrained by their imagination. The filmmaker is constrained by what is realistically possible to create.
Unlike the screenwriter, the editor must be a realist.
Readers insert their own voices and rhythms into the stories they consumer. An editor can only work with the material they have available to them. He or she must see and understand the film as it is, not as they wish it was. Everything that led up to this point -- the writing, pre-production, cinematography, directing, actor performances, etc. -- places a hard limit on the film an editor can create.
“It's hard for people to understand editing, I think. It's absolutely like sculpture. You get a big lump of clay, and you have to form it - this raw, unedited, very long footage.”
-Thelma Schoonmaker
At the same time, the editor also has powerful creative tools that define every other aspect of what a film can be such as music, sound, silence, color, visual effects, and most of all… Time.
As editors, we control the structure and the rhythm of a film on a macro-level and everything about the way a film is paced and organized on a micro-level. We decide who says what, in what order, what takes are used and discarded, which reactions and inserts are presented in which sequence, where the audience should focus their attention, what aspects of the plot get emphasized and which get eliminated… In the end, we have virtually unlimited power to shape and reshape the raw material as we see fit.
This is a lot of power and a lot of responsibility.
For scripted, narrative projects, we have a guide -- a written story to inform our decision-making. But for unscripted and documentary editing, we have to find the story ourselves, and while that is a thrilling opportunity to create something out of nothing, it’s also an opportunity to abuse our power by misleading or creating a false presentation of someone else’s words and ideas.
It is for this reason that I think in addition to being an adept storyteller who understands emotion, story structure, rhythm, and all the technical aspects of the artform, an editor must also possess a strong code of ethics that prizes honesty -- to the script or written story and the director’s vision or to the unscripted interview subject -- above flashiness or personal gain.
Especially in the world of video creation for social media, the pressure is often on editors to create the most “viral” content possible -- the most shocking or sensational, the most news or headline-worthy, the most vitriolic or dramatic. The drive to create content that gets attention is a good one, but it must never come at the expense of the truth, or we lose all credibility and harm people through deception.